Bubble.io Uploader
The purpose of the uploader element is to offer users of your web application the ability to upload videos to api.video.
It comes as a customizable button that opens a file selector when clicked. Once the file to upload is selected, the upload progression is exposed as a state of the element.
Usage
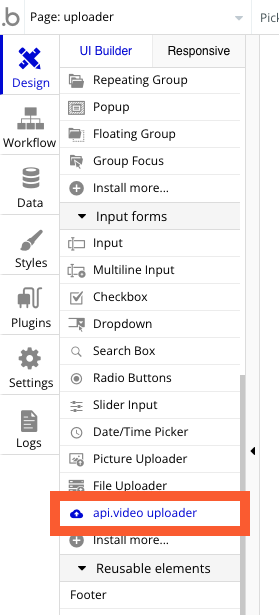
To add an uploader element on a page, click on the "api.video uploader" item of the Input form elements list.
Then, draw the uploader on your page using your mouse, like you do we any other Visual component. You can change the style of the element as you usually do. Once done, double-click on the player to open the window for editing its properties.
There is one element property that you have to define to use the uploader: the "upload token." Upload tokens are also known as "Delegated Upload Tokens." They work like public keys to your api.video account, allowing secure uploads without exposing your API key client-side.
There are several ways to proceed with the upload token:
- Generate a token once and use it for all uploads. To generate a token, you'll have to call the api.video API as described in this article: Delegated uploads: Make video uploads with a token you create
- Let Bubble make the call to the token generation API thanks to the API calls predefined in the plugin. This particular topic is covered here: Bubble.io API calls. You can generate a new token:
- When a new user sign-in in your application and save the token in this user's database entry
- When an upload is going to be made (in this case, the token may be created with a short lifetime).
Events
Two events are triggered by the uploader element:
startwhen the upload starts (right after the user has selected a file)endwhen the upload has just finished
You can rely on these events to make changes in the interface (for instance, to hide the uploader and show a progress bar instead when the start event is received).
To perform such action when an event occurs, go to the workflow tab, create a new workflow, and as a trigger condition, select "Elements -> A api.video uploader ...".
Exposed state
The component exposes two states:
percentis a percentage representing the upload progressvideoidonce the video has been uploaded, this state will contain the api.video's unique identifier of the new. This is an important value that you will want to store in your database in most cases.